Are you working with Mozilla Hubs, the Metaverse platform? Follow the instructions below to get your scenes to get your lightmaps to mirror your rendered results!
You can download the example file here. Note that the textures were obtained via free download from Textures.com and the HDRI is from Polyhaven.
Step One
The first thing to do is to set up your Blender file properly. Let’s start with your UV Maps.
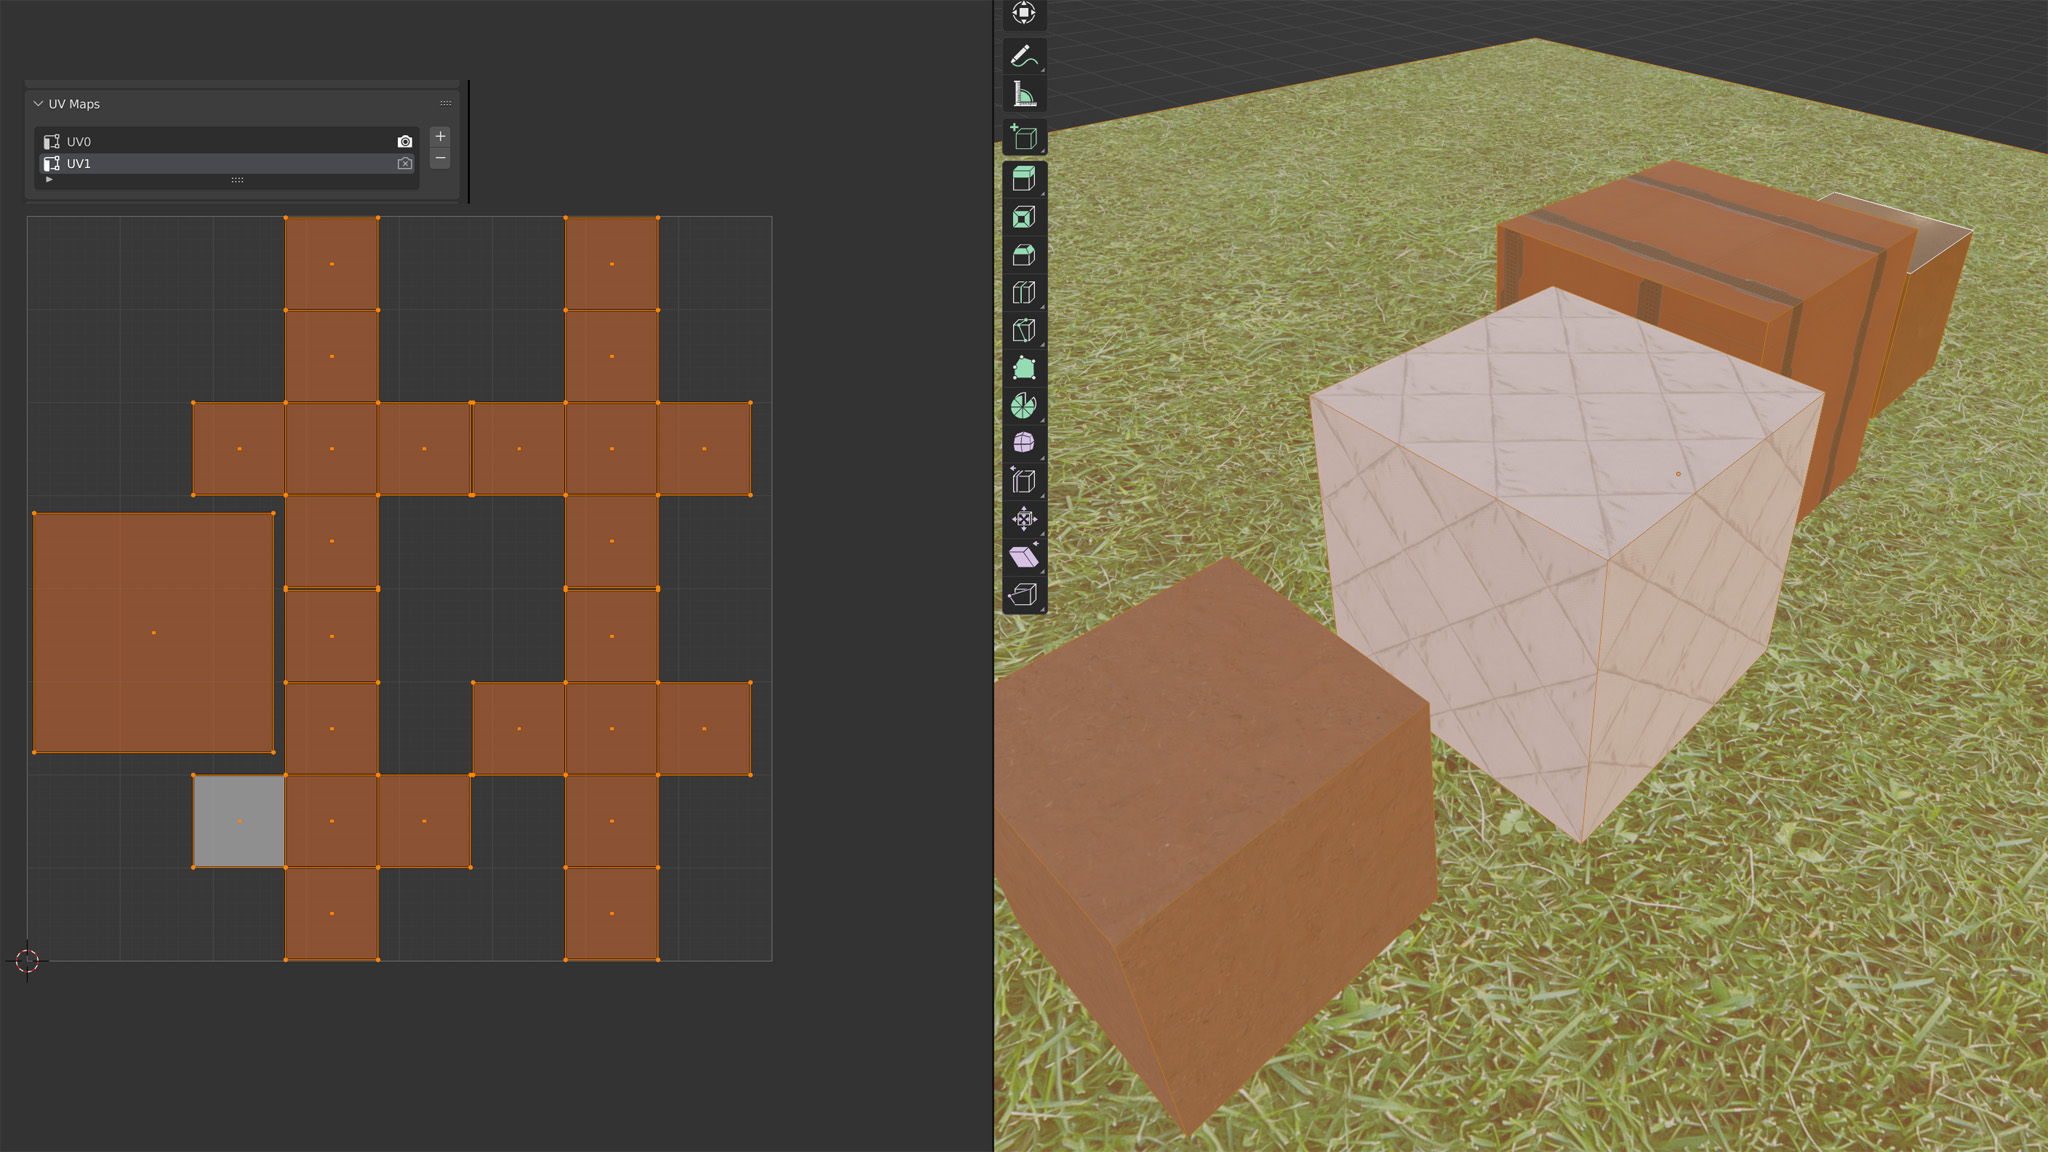
Make sure that you have a second UV set – this will be used for the Lightmap. To add a UV set, navigate to the Data Properties of your mesh, go to UV Maps and click the + sign to the right of the box. I like to name my texture UV; UV0 and my Lightmap UV; UV1.
Once you’ve created the Lightmap UV set, make sure all of your mesh is packed into it’s 0-1 UV space.
Step Two
Next, let’s get your materials setup.
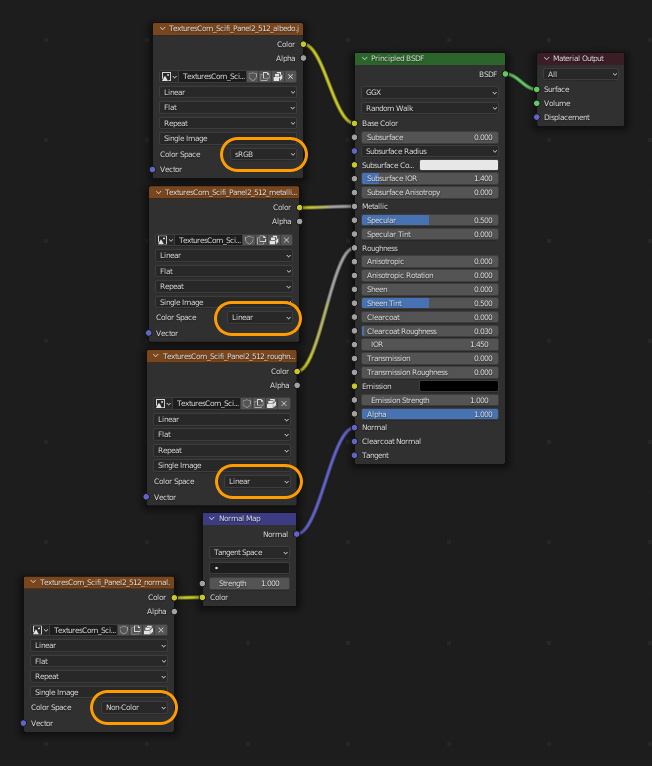
The biggest thing about setting up your materials properly is having the correct colorspaces. Metalness, Roughness, Ambient Occlusion and Specular (if used) should all be set to Linear interpretation.
The Albedo/Diffuse channel is generally set to sRGB.
Normal maps should be set to “Non-Color” and plugged into a “Normal Map” node before being plugged into the material.
Important!
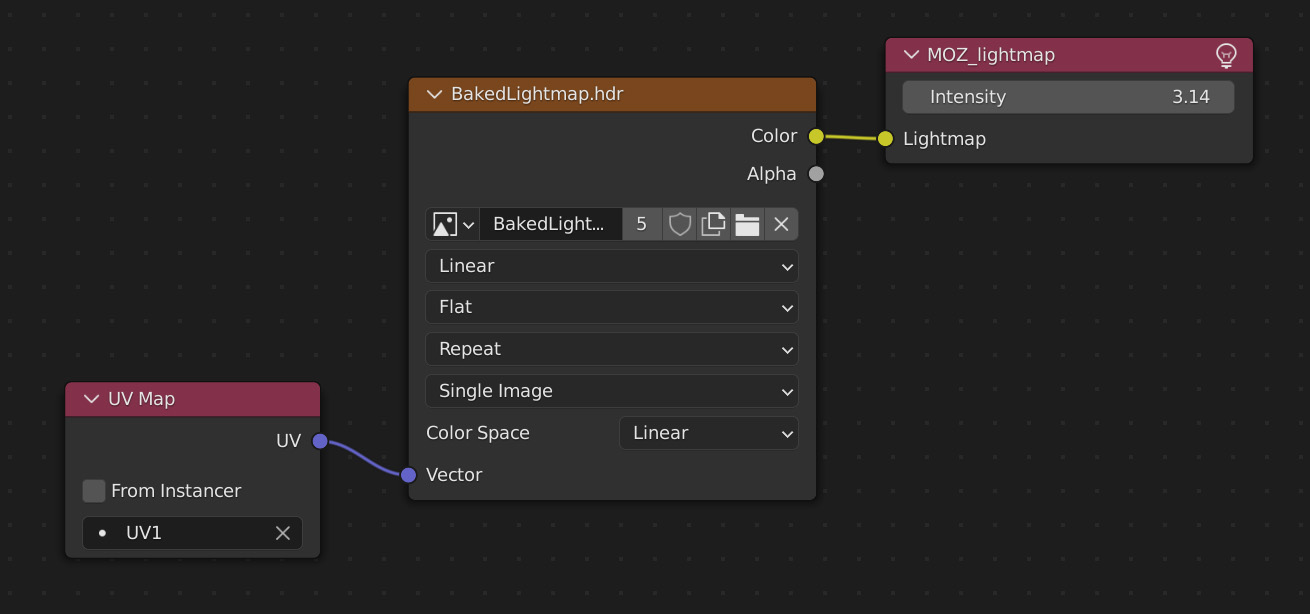
Take the Image Texture you will be using as a Lightmap. This needs to be an HDR image. If you are baking out of Blender, save the image as a .HDR. Set the HDR image to Linear Colorspace.
Plug UV1 into the UV Map slot for this texture.
Create a Mozilla Lightmap node. Set it’s value to 3.14.
Start by creating an Ambient Occlusion node in the Shader Editor. To create a group, select the Ambient Occlusion node and then hit Ctrl-G, or go to Node -> Make Group.
Once created you will automatically enter the group. Delete the Ambient Occlusion node.
Open the Group’s nPanel (right side of the Shader Editor). You can do this by clicking and dragging on the small arrow that’s on the right side of the Editor. Click the Group panel.
Delete all of the Outputs and every Input except for Color.
Change the Color node’s name to Occlusion. Exit the group by double clicking any empty space in the Editor. Once out of the group, change the name of the group to “GLTF Settings”. Make sure you put the space in! Plug your AO map into the new Occlusion slot.
Step Three
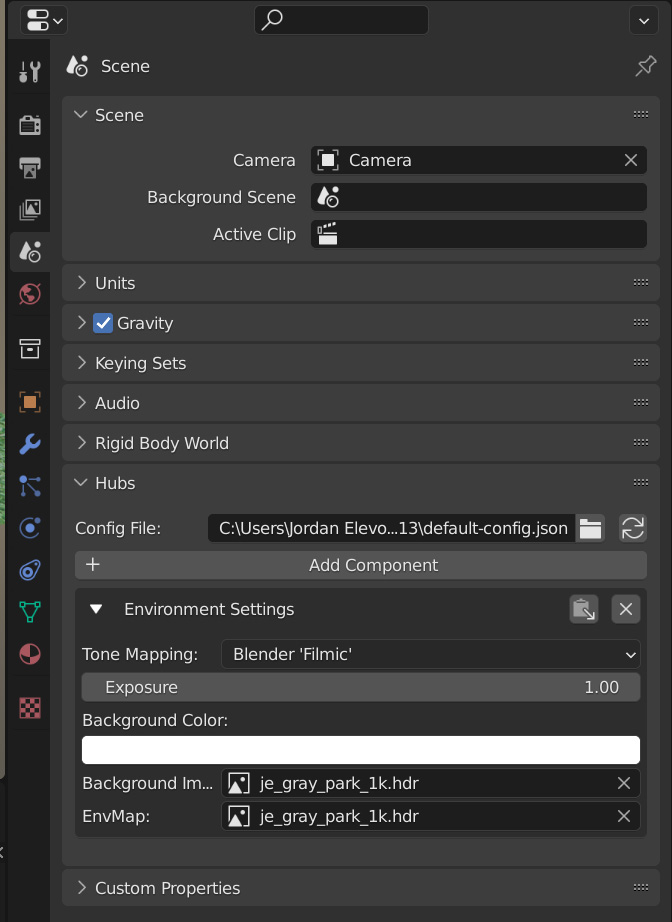
Under Scene Properties, go to the Hubs dropdown and add an Environment Settings component.
The Background image will be used for the Skybox and the EnvMap will be used for reflections. If you’d like you can add the same HDRI to both. Just make sure you set the Tone Mapping to Blender ‘Filmic’ and the Exposure to 1.
Step Four
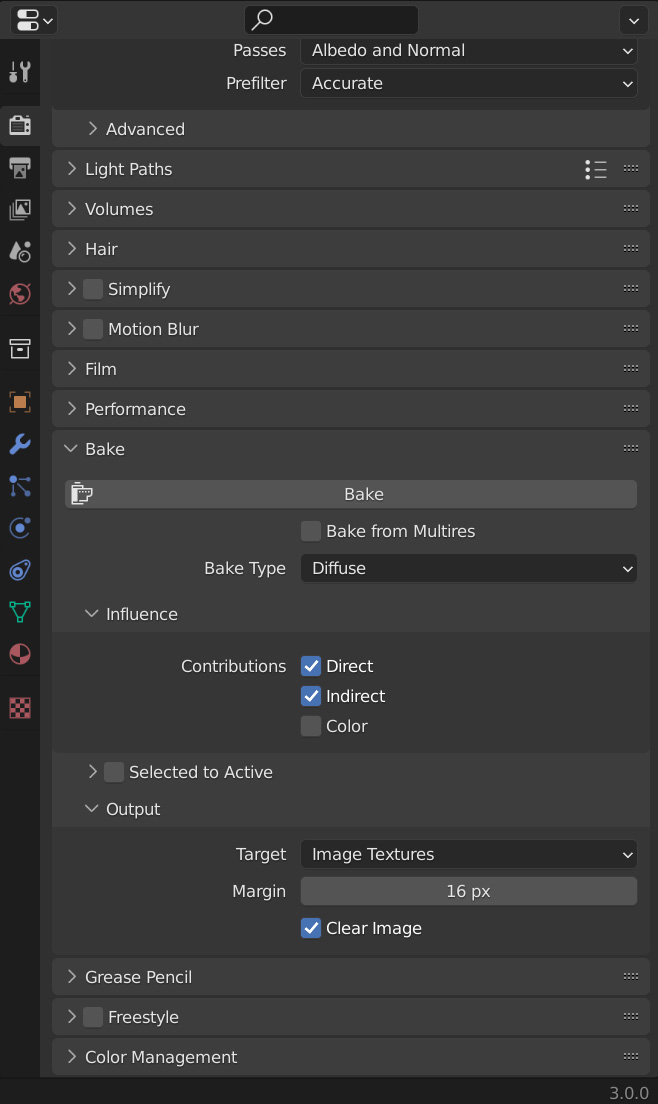
The recommended bake settings are to use the Diffuse type and set Contributions to Direct and Indirect only. If this doesn’t work, you can assign a flat grey material to the entire scene and do a Combined bake with the Contributions set to Direct, Indirect and Diffuse.

